Start with a pattern you can get for free at:
QuiltMaker Magazine
Theirs is for 6" blocks and I made mine smaller and made up a Master sheet so I could make copies of it and save some paper.
Cut your copies into single blades (1/2 of a kiss).

Start by choosing your colors and pinning on #1. (#2, 3 and 5 are background pieces. #1 and 4 are kiss parts.) I'm using pink or white for the kiss parts.
(Make sure the #1 piece is pretty side out on the unprinted side.)
Place the #2 piece, (green and white print) face up, and leaving enough seam allowance. Set your machine for small stitches. (On mine I use 15 stitches to the inch.) Now back stitch at beginning, sew along the line, then back stitch at the end of the seam. Easy-Peasy.
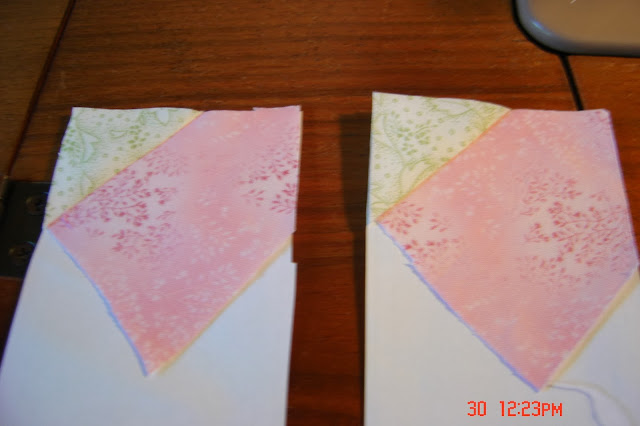
Now trim off the strip of #2 fabric... Never trim until it is flipped.
I make the two pieces at one time... it's faster that way.
Now the #3 piece. Sewn, seam allowance trimmed, pressed, flipped and pressed again. I usually put a pin in this tail (top left) but I didn't show that part on a picture.
When your two halves are done you can make hugs, or turn the pieces around and....
make a kiss.
Here's our block on the design wall... just pinned - not yet sewn together. I might want to mix them up a bit before I sew.
(27 more blocks - 54 more blades to go)
The block just made is the lower left.
Linking up to Confessions of a Fabric Addict... see the sidebar for the location.
Next time I'll show my technique for sewing the blocks together.
Hugs, (and kisses)
Terri


thanks for the tute--this will be soooo cute, Terri! Happy New Year to you...hugs, Julierose
ReplyDeleteI string piece when paper piecing, too. I'm supposed to be paper piecing now, but, I've been trying to get caught up on my blog reading all day long.
ReplyDeleteGreat Tutorial Terri! I had no idea how you were making these and I DID wonder. I can see myself doing one of these from scraps at some point in the future. Thanks for showing me how!
ReplyDeleteHappy New Years! I look forward to following all the lovely blogs you post and the wonderful quilts.
ReplyDeleteWhat a great tutorial! I'll have to give it a try!!
ReplyDeleteThese are looking so sweet!
ReplyDeleteI love your blocks, Terri.
ReplyDeleteThank you for sharing a beautiful memory of your baby girl.
Those kisses are adorable!
ReplyDeleteVery vey sweet!
Esther
Terri, Thanks for linking up to the birthday giveaway. Your number was chosen as our third place winner. You can choose any pattern (up to $4) . Let me know what you have chosen and I'll send you the pattern.
ReplyDeleteJaneen
quiltartdesigns.blogspot.com