Pages

Friends

Monday, February 11, 2013

Wanna see a cute little Cork Oak? and more paper piecing.

I have a forest growing in my hubby's office. This is a Cork Oak, they are evergreens, so there won't be just sticks at Halloween! (McDonald's large drink sized cups work great for Trick or Treater's plants. I'm reusing, and the kids recognize it. The cups are plastic, so they will hold up long enough to get to Oct 31 and beyond, and I'm able to cut holes at the bottom sides with a scissors.)


These are weeks older.... I planted 7 acorns, so far I have 6 cork oaks! That's the best percentage I've ever had!

This is a Rabbit Foot Fern I started from my big plant in a laundry soap scoop with an instant coffee cover as a drip catcher. I'm so pleased with it, too. It's in a sunny window in the computer room.

This is the rubber stamp room. (We call it the way back room. Remember the way back machine on the history cartoon on the  Rocky and Bullwinkle show? I'd guess most of you are too young to remember that. Your educations are sadly lacking.) Anyway, I store my rubber stamps in this room - a whole room!  The tiny sprout (in the right cup) is an Osage Orange... looks really strong, yet it can't get out of its seed coat.  Maybe tomorrow.

 This is the magnificent Magnolia I started from a seed. Strong and ready for a bigger pot, I'd say. This is one out of 11, one of my worst percentages ever. But I GOT ONE! Now to keep it happy.
(Beyond is the backyard in winter. Never any snow, and we haven't had any rain in weeks either. It freezes at night sometimes, and is in the 60s during the days right now.)

So back to work - More paper piecing tips.

This is the last piece on Dobby. I have all the other 7 pieces done. This piece has one of my nemesis. Its that four sided piece that gets sewn at a slant. I'm going to show you how I do these. It looks like it will fit, doesn't it.... Bwahaha... Don't trust it!  It is evil.

I set the fabric on and pin the sewing line with at least 2 pins. Then I can see if there is enough seam allowance and enough fabric to cover the piece - next picture....
Ha Ha. It doesn't! See that big white uncovered spot? It should be covered. So what shall we do now?

I go for a big piece of fabric - actually the whole yardage piece. I put enough seam allowance and sew.

Iron and fold the fabric over to the final destination, and it fits. You can use scraps to make your paper piecing, but when you come to the dreaded 4 sided pieces - splurge... or you will go crazy!
{I actually sewed, ripped and sewed a single piece 9X before I gave up and used a bigger bit of fabric, that's crazy.}

Here's the hole it left in my yardage.

Next retrieve the sewing order listed on all good paper piecing recipes.
 Sorry about the picture. First is to join B to C.
I like to line up all the pieces like the pattern (shown at the beginning which was a few days ago.). A and B are the two at the top. I took B and C and put right sides together... fabric together (I'm telling you this because a couple of times I got paper and paper together - Really I have made every mistake there is in paper piecing, I think. Why, just the other day I had to make the "C" over - that's why it isn't colored like the rest of the pieces. I sewed the wrong seam line and obliterated Dobby's bulgy eye. Oops. Instead of ripping I made another copy of the pattern and started over.)

So here are the two to be joined.

Stick pins into the two corners - you can hold the pin while adjusting it in the back piece so it goes through both pieces exactly through the corners and then I add another pin in the middle - straight through...

(Here are the pins going straight through....)

Next you add pins to hold the pieces while sewing and take out the straight through pins.
(Try to keep the straight through pins going straight... not lolling to the side... while adding the pins that will hold while sewing. Very important to remove the straight through pins before sewing.)

(With the straight through pins removed. Ready to sew on the seam line.)

After the seam is sewn, remove the paper from the seam allowances. If you wait until the whole thing is done, there will be paper to remove under the pressed seams that you can't see, and it's harder to remove.
 
I press the seam allowance towards the piece with the least bulk at that seam. If they are both bulky press them open.


Another look at that straight through pinning trick. It's a longer seam so more pins.

the back with the pins coming through

With the sewing pins in place and the straight through pins removed.
Now sew.


All done. Dobby wearing his dirty pillowcase.
 
So that's a blow by blow .... hope you will try some paper piecing. It is really fun.
Tomorrow I'll show the apple core UFO and some other bits I have paper pieced that aren't
 Harry Potter.
 
Hugs
Terri


Saturday, February 9, 2013

Photos from Folsom Quilt Show


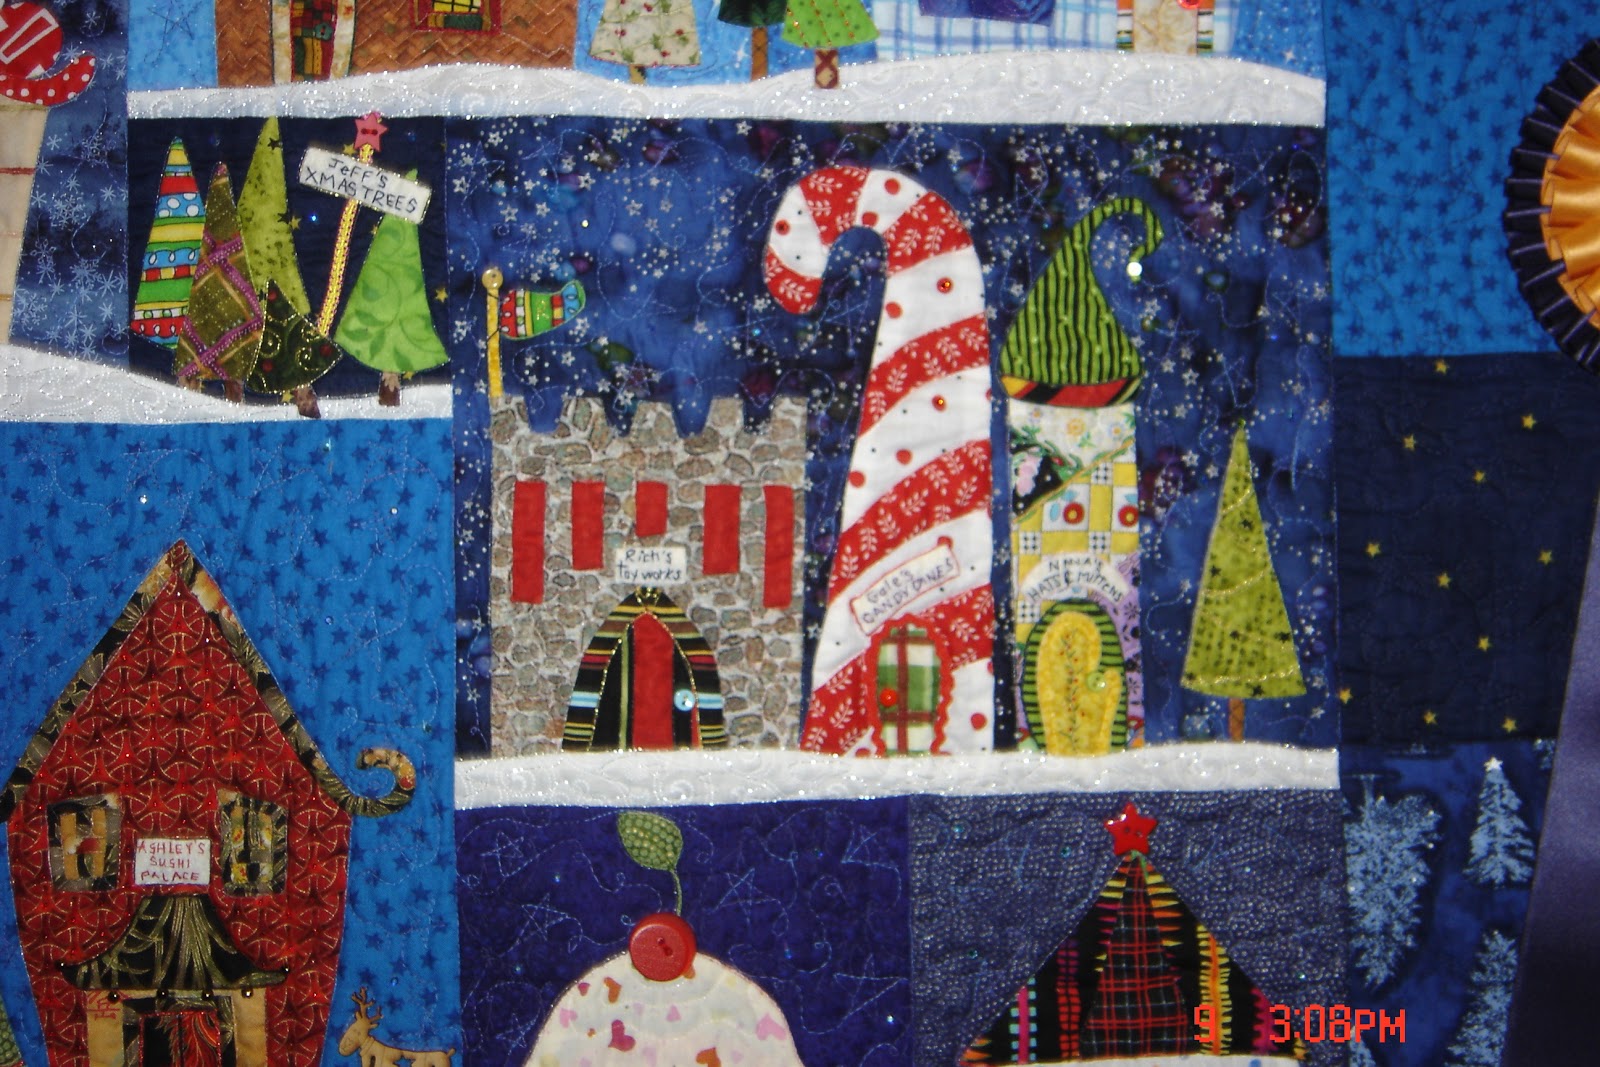
Sorry I didn't get full quilts.... the quilts were so crowded together that you couldn't stand far enough away.  Sorry, too, that I didn't keep track of who, what where or how... (Also, the camera isn't that accurate with the colors I witnessed.)
First one that I liked.


I took a bunch of separate close-ups of this one (below) for Melanie.  Didn't you make this pattern last year? Thought you'd like to see what someone else did with it.


I really liked the one below, but it seems to me that the colors were much richer.

 
And I had to have a picture of this one. (I'm entertaining the thought of making one sort of like it.)

 
So I'm not pushing my luck with the pictures today. I'll ad some to the blog for tomorrow.
 
Hugs
Terri

Friday, February 8, 2013

Just to stay in the loop

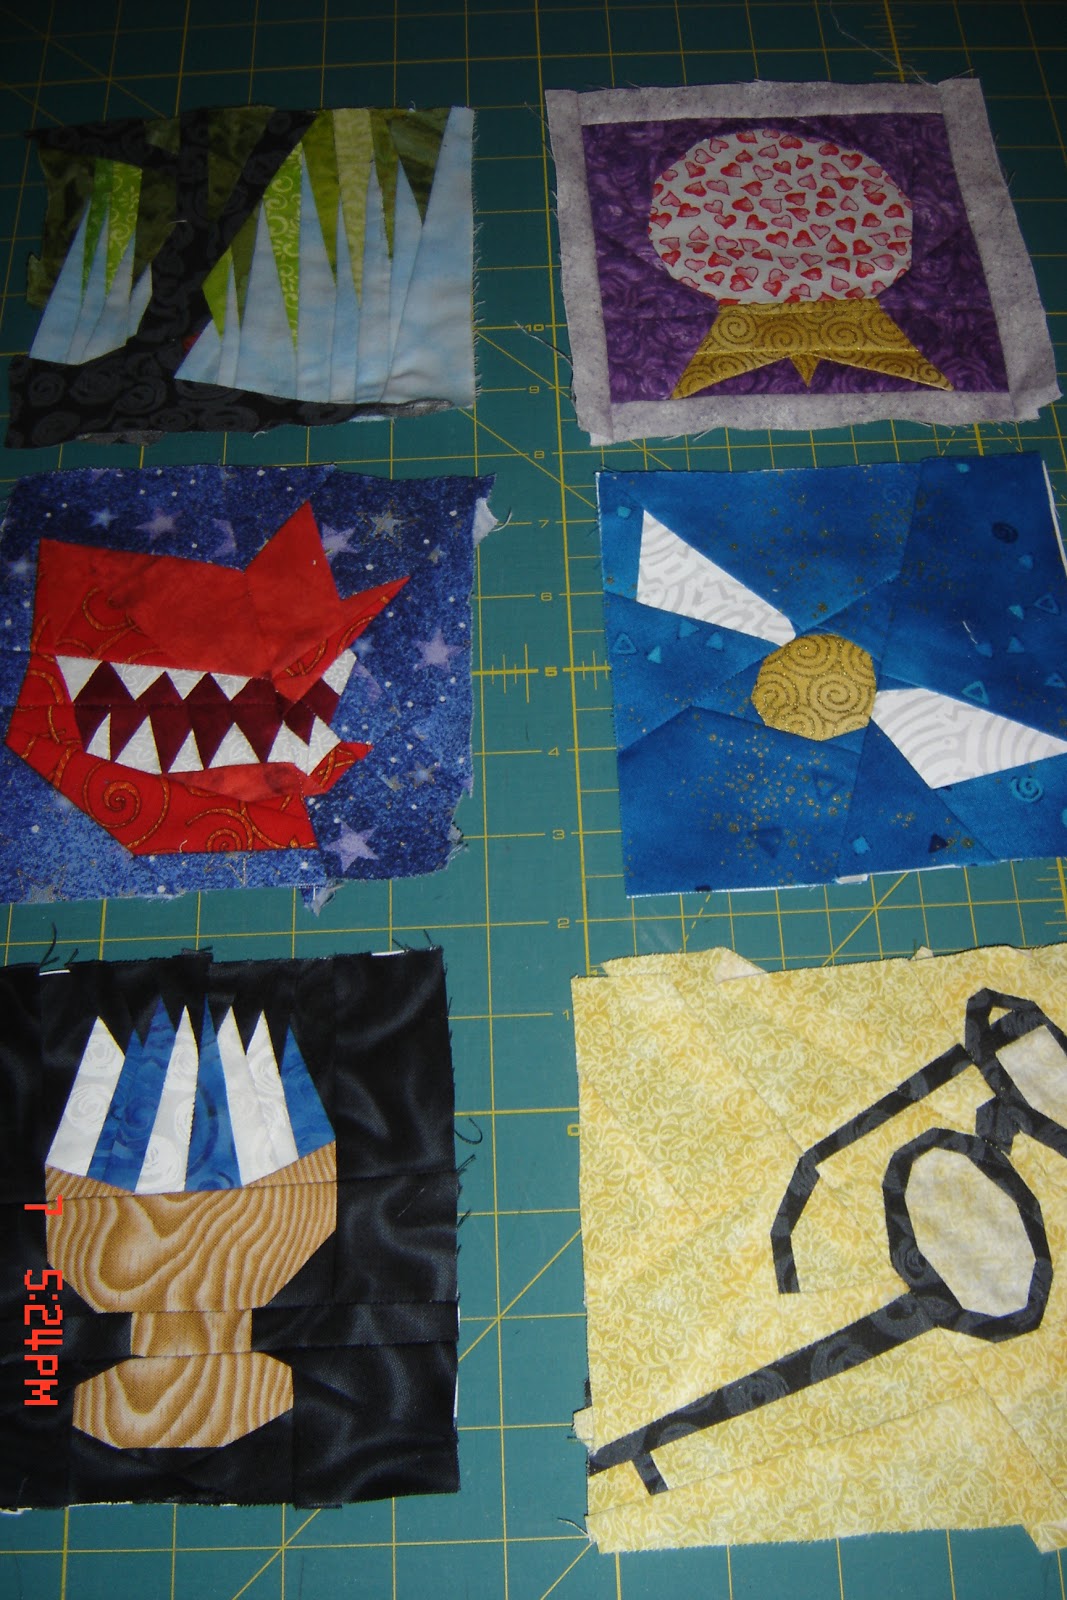
A few more blocks from the past.
Bottom left is the Goblet of Fire... it was wooden in the book, so I used the wood look fabric.

Why is it that the upper left shows so dark? So here is a better picture of the Whomping Willow.
 
Going to the Folsom Quilt Show today. They have a Fashion Show each time. This is probably my 14th year going to this guild's show. It's really fun. - I'll take some pictures if they allow it... and show some here on the blog.
 
Hugs,
Terri

Sunday, February 3, 2013

A Paper Piecing Start...


The pattern (Dobby, the Houseelf) from Fandom In Stitches
 
Cut out the pieces (save the section that tells the sewing order.)
 

Choose fabrics - dark brown for the eyes, flesh tone, a spotty beige for the pillow case he wears, the dark blue for the background, white for the whites of his eyes, and a spotty brown for inside his ear.

 I like to start by cutting and pinning all the #1 spots. Hold it up to the light to make sure all the seam allowances are covered. (Also, notice I skipped a step in the pictures and wrote the color on all the different shapes. That has saved me soooooo many times. (Once the pieces are cut apart you can't tell what color something should be. Is this an arm or a nose?)
Here another #1 on a different piece. Yup, it covers.

Hold the #2 fabric next to the #1 and sew along the line between them.

Put the needle down into the top of the seam annnnnnnd

swing the new addition into place so there's enough seam allowance. (Your fabrics are right sides together, that means that #2, or the fabric being added this time, is right sides up.)
After sewing

fold it back into it's rightful place before cutting off the excess. (I wish someone had told me this part. I cut soooo many wrong when I first started.

Luckily this light color covers the darker... now press the seam and flip and press it out into its permanent position.

If the seam allowance shows some of the dark seam allowance under the light colored fabric - grade your seam allowance. Cut the darker color smaller than the top, and you won't get a shadow of it showing through your lighter color.

A couple of other shapes  added now, and I'm done with this piece.


Another piece - this brown triangle is going to show through the fleshtone...
so I cut the brown seam allowance smaller than the fleshtone seam allowance.

partly cut

 Cut off - with scissors - quicker than the blade, and I can cut one piece different than the other piece of the seam allowance.
See? Now the brown won't shadow through.

After pressing - no shadow.
Just continue adding pieces - in a sequential way. Just follow the numbers, and apply the correct colors. I'll show how to put the pieces together tomorrow.

Have fun... if you really mess up a piece, you can always printout another and start over with that one piece. I've done that... saves on picking (and sanity), and well, picking might not be the solution if you have too little fabric.  I know it doesn't look like much in these pictures, but it will once they are all  pieced together.

Hugs,
Terri