Pages

Friends

Friday, March 23, 2012

The rest of the story... and some flowers.

Thank you for all your prayers for my Chrissy. She is in her own room now, and I talked with her last night, and she is very quiet, subdued by the pain meds, but doing really well - considering what they extracted.  Her spirits are high, and she is very thankful for all the prayers she has been getting. Now she rests in the hospital for at least a week. The first week is critical for the liver to rebuild. Her goal, she said, was to be able to walk to the bathroom herself, today. A lofty goal, I'd say. But I know she will get there.  Please keep her in your prayers, at least for a few more days....

Now my afore mentioned tutorial to put paper pieced blocks together. The first two blocks for my H2H quilt.
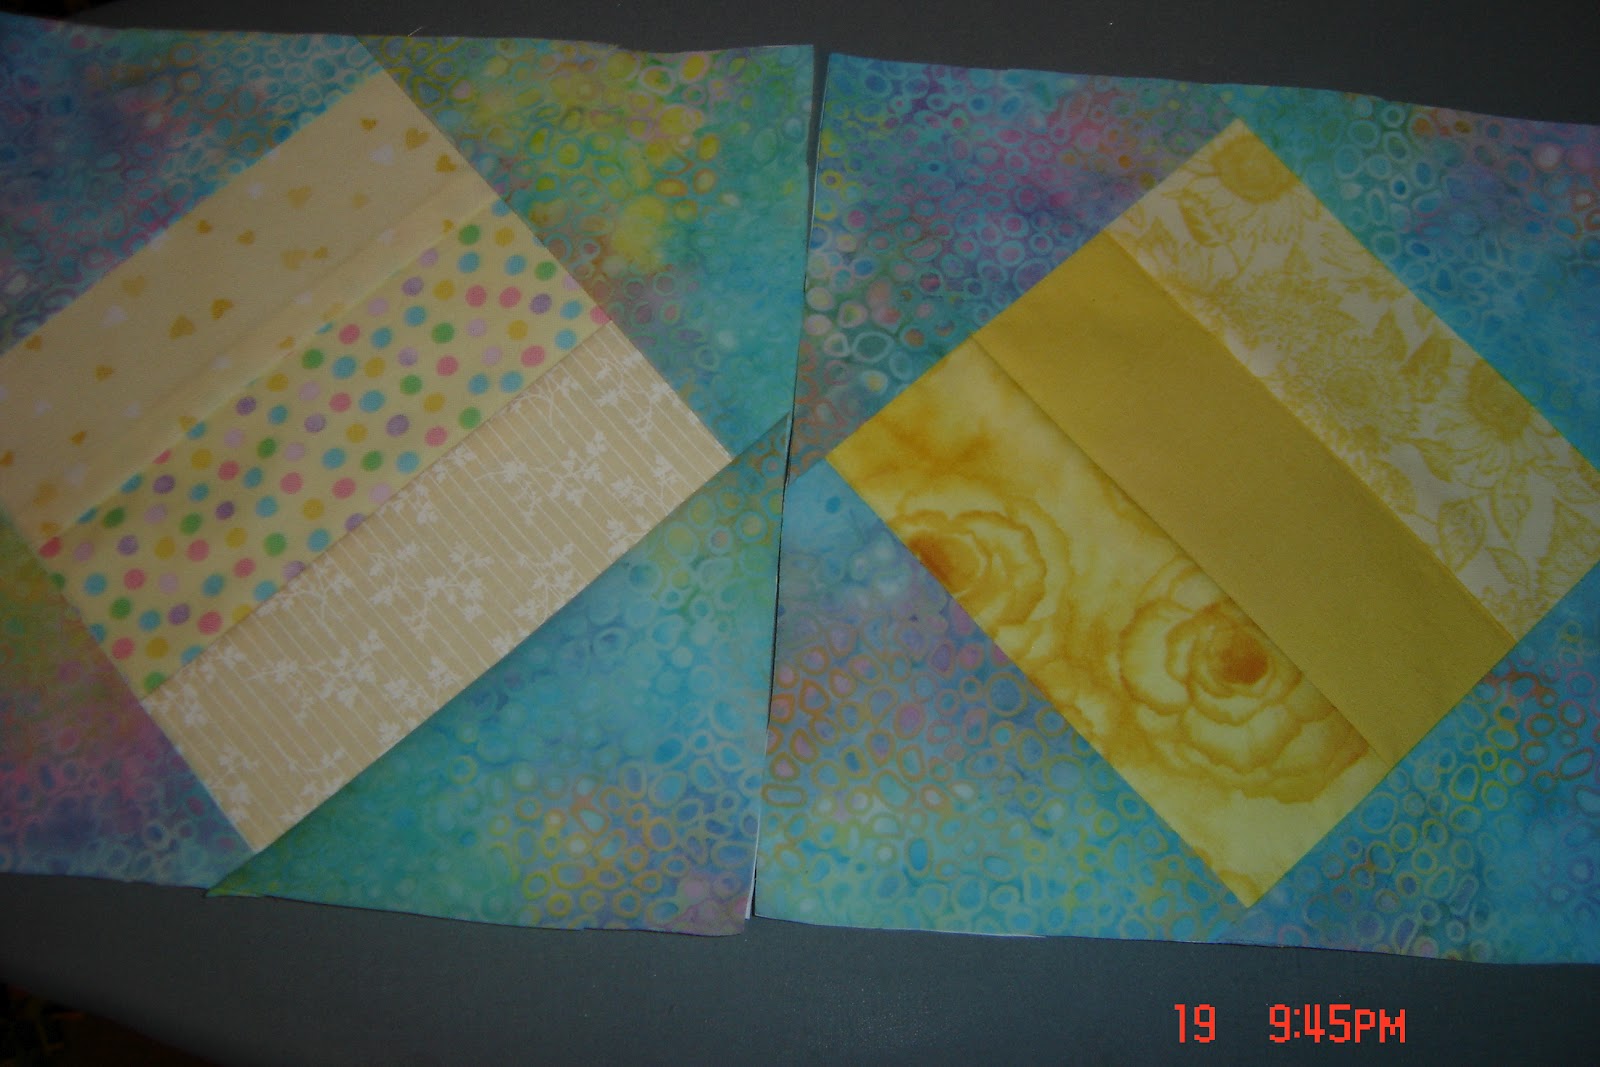
I left the backing papers on so I could
face them together - pretty side to pretty side, and pin through...

sorry about the fuzziness... pin through...straight through both ends, and the center... then with different pins - pin next to the through pins. Be careful not to distort the straightness of the straight through pins. Remove the straight through pins.


Now sew along the seam line to join the two blocks.
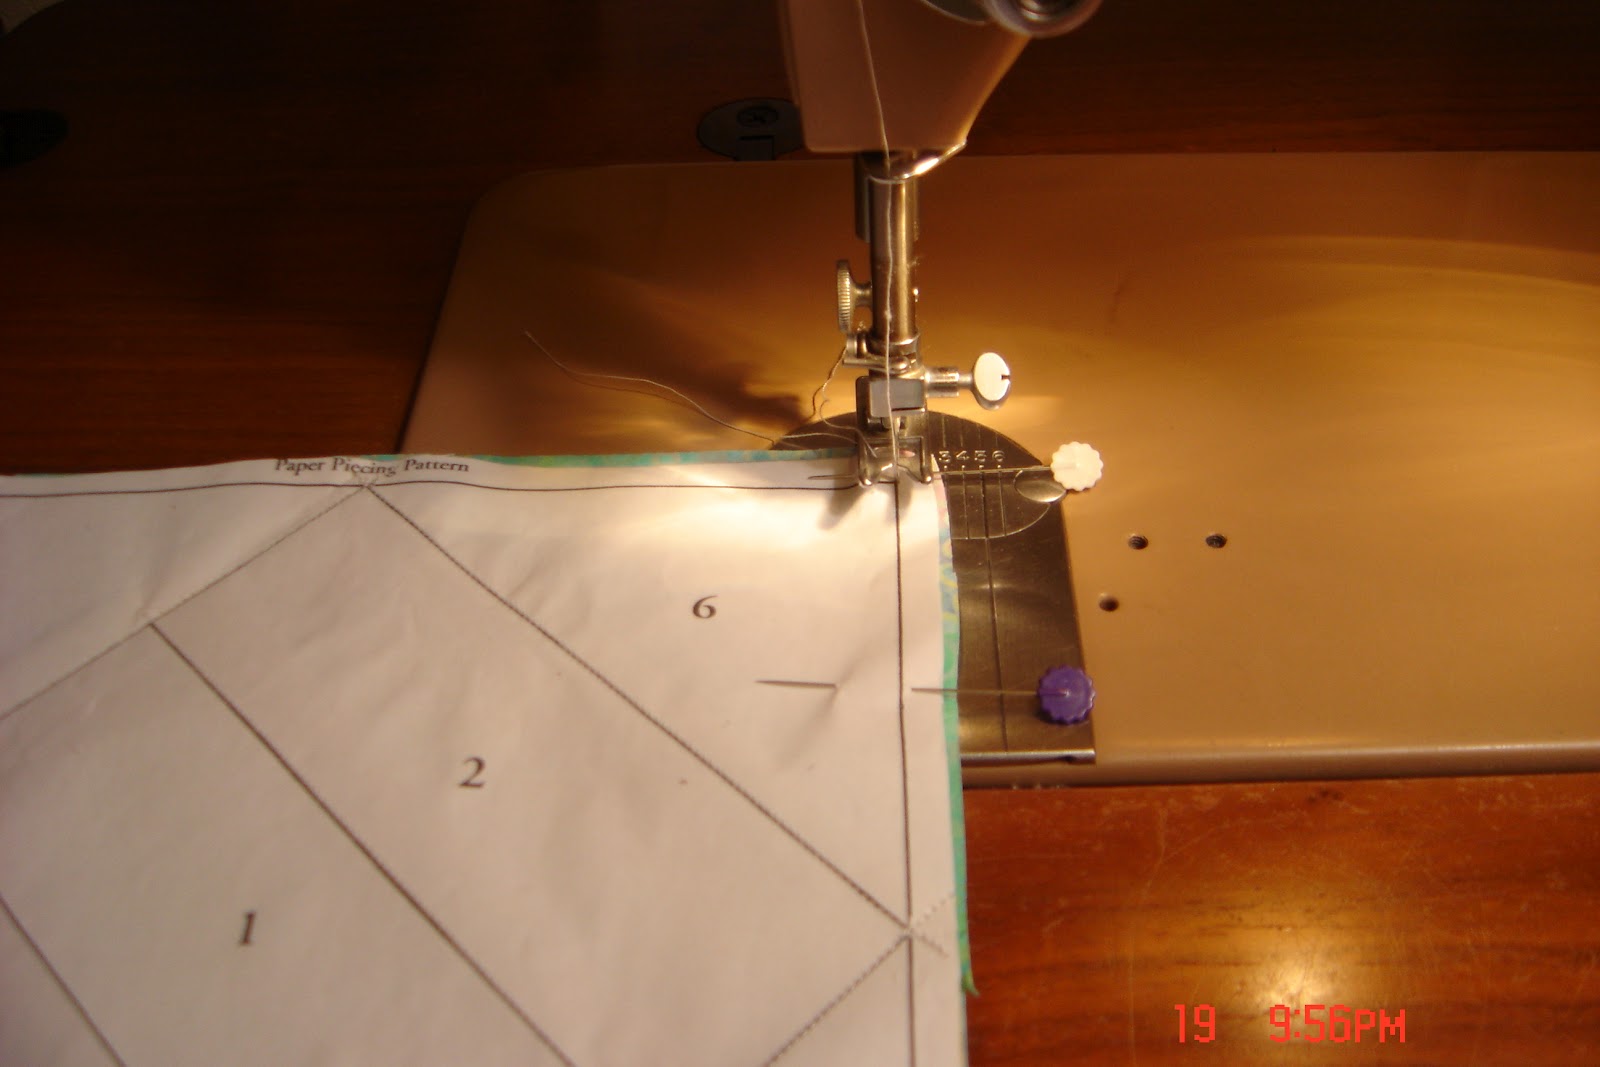
 Rip off the paper on the seam allowance only... you need the paper for the next block additions. Folding the paper at the stitches makes it easier to rip.

I use the seam ripper to help loosen the stubborn little pieces... careful not to rip out the stitches.


And Voila! Two as one. A successful marriage. (What is it when you add the next block? Hee Hee) This method assures that you will have the right amount of seam allowance, points are easy to match, etc. (Notice the ends of the seams do not... I never cut the 1/4 inch. I have a shaky hand, and sometimes ruin the 1/4.... now you know the secret!)


Not to change the subject or anything, but my tiny orchid blossomed!!!!! It has the most wonderful scent. Most orchids do not have a scent. I'm sorry that I can't tell you what kind it is.

 Earlier this week I drafted a paper piecing pattern for my friend, Sheila from Sew, Cook and Travel. I hope she shares her blocks today, so I can see what she did. You've gotta see her quilts! So colorful and cheery.

Here's what I did with the pattern. The whole quilt will be red, my "favorite color and it's tints and shades" for the Project Linus Open House at our leaders home in May. She usually sets us to some challenge for a quilt to show at the Open House. (This time there shouldn't be so many brown quilts... please!)

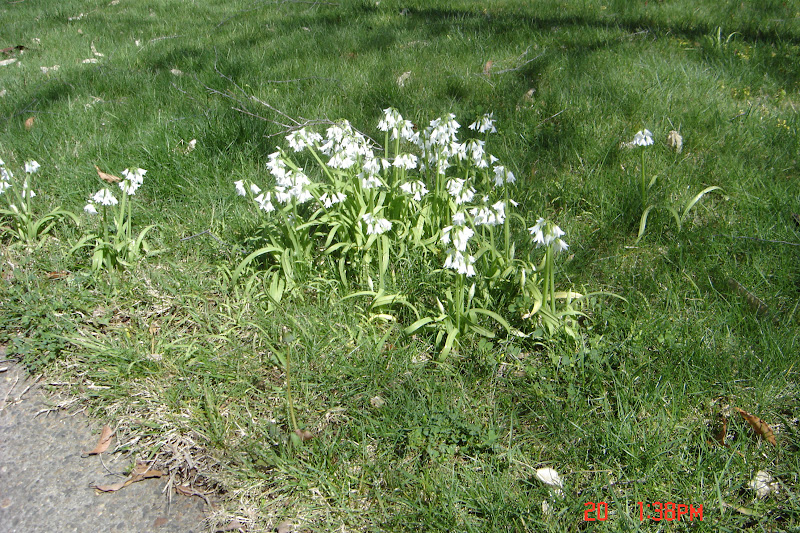
And finally, for you spring challenged, the snowdrops blooming in my front/side yard... under the birch trees. (I think the birch were planted to represent each of the family previous to us. One, sadly, has died now. There are still 6.)
So that concludes our visit, and the tutorial.  Hope all is well with you and yours. Which reminds me to beg you to continue to pray for my Chrissy. There are still miracles needed!

Hugs,
Terri


Thursday, March 22, 2012

Feeling better, but still no word.

Thank you all who are praying for my Chrissy. There is still no news from our SIL. So please continue to pray for her. 


While reading blogs this morning I came across some questions to answer...from the Empress of the Universe... seemed like a fun way to post today. Do any of you remember "slam books"? (For you youngens it was a notebook that had a question on each page, that you were supposed to answer. (Prohibited at my school, but we found a way...)

1. How long have you been quilting?
I made an ugly baby quilt for my Chrissy out of scraps from sewing clothes... May 1973. I tied it, so it really wasn't a quilt, but I didn't know that then. I used blanket binding (that satin stuff you buy in the notions dept.) and she would rub it as she fell asleep, and while sleeping.

2. What quilting/sewing tool to you find most useful?
The combo of rotary cutter, cutting mat and ruler... what a time saver!

3. Do you belong to a quilt guild?
I'm kind of an antisocial - you all are my besties. I would love to be in the Folsom Quilt Guild, but they are full and have a waiting list...
4. Do you have a local quilt shop?
Besides 3 JoAnn's and a Hobby Lobby within 25 miles, there are 5 independent quilt stores that are within that same 25. (There are 4 (that I know of) that have gone out of business recently... always a sad event.)

5. Do you quilt your own quilts or quilt "by check"?
I haven't the check - so it's sew it yourself! (All and any money above household requirements are turned into fabric stash...)
6. How many finished quilts to you have in your home?
I give all away that I have made. I do have 4 that were made by my Grandma. One day I'll show and tell those here on the blog. (I'm very proud of them - her color sense is amazing!)
7. How many UFOs/WIPs do you have right now?
LOL!!!!!!!!!!! Have you been peeking? I have 2 (overlapping each other) on the design wall right now. Another I am sewing for the Hands 2 Help Challenge. Another started for the Open House (in May) for Project Linus. Then there are at least 6 in boxes on top the shelf, and 2 that are waiting on the couch for me to hide the strings and bind them....There are lots of blocks sewn for various wannabe quilts, too.  OMG. I just get ahead of myself. So I guess the answer is 12. If I waited to finish the first UFO, I would never have made a second. I've made lots of different quilts since starting that red and off white that I call the "cherry pie" (about 15 years ago).  Since then I've made and given away at least 13 to family members, and 7 to Project Linus... and parts to Sarah's group that they made into 2 quilts.  So I don't feel guilty at all. (You shouldn't either.)

8. What's the farthest you've been from home?
England - we went to visit our son and his family when they were stationed there in the Air Force in 1998. We also visited with hubby's brother - a dual citizen - and his significant other. They took us around to places like a play (Miss Saigon) in London and Kew Gardens. The kids took us to Warwick Castle (being featured on Busy Busy BJ's blog today) and Stonehenge!!!!

9. I'm going to take you out to dinner and I'm paying... where are we going and what will we have?
You can get a "meal" off the dollar menu, a senior drink and a free frosty at Wendy's for under $3. I wouldn't want you to spend too much on me. Now if you were taking me to a quilt or fabric store...

10. When was the last time you bought fabric?
I haven't in a long while, economics... but a girl can only hold out so long! Gotta confess, I bought 4 FQs at JoAnn's yesterday.

11. Thread... more than 100 spools or less?
I've used up most of my stash. Some is so old that it's still on the wooden spools that were given to me by my grandma. (It might still be good, but I really don't want to use it. It's now more than antique.) Maybe 2 dozen spools are in the sewing box. Some of that is unsuitable for quilting.


Well, that was fun.  Gotta take a break and edit later... Hubby needs to eat.


Tut tomorrow.

Wednesday, March 21, 2012

A binding tut at a different location

Hello Friends,
I'm late, I know. I promised to share a secret - and got side tracked.  Actually there was alot of worrying going on here yesterday, so I didn't feel like putting on the happy face.
Our daughter is in the ICU still, and will be for a couple of more days. (As you know, she had surgery yesterday.) The surgeon took 40% of her liver on one side, and made some holes on the other side as well... She's only got 50% left. Surgery went well - said her hubby when he called afterwards... I never felt so sorry for my SIL as yesterday.  I've never heard him so close to crying. Please keep up the prayers. She still isn't out of the woods.

Here's a really good tut on the "right" way to end your binding in a smooth way... I found it today on one of the WIP Wednesday sites:

http://dragonflyquiltworks.com/2012/03/21/wip-wednesday-binding/

Let me know if you want that Traveling Box.... Check back a few blogs to see how. Some of you seem to be confused as to how to apply for it. Only one person has done the right thing to get it.  Drawing on Saturday.

Sorry, but that's all for today.. Just don't feel like uploading the pics, or any of that linking stuff
Hugs,
Terri

Monday, March 19, 2012

Win the traveling box... what I'm working on... and a paper piecing toot!

Hello Friends,
Here's block one done! I'm making this quilt - easy paper piecing - for the Hands 2 Help Quilt Challenge .  There is still time to sign up... Please use the link above to check it out, especially if you would like to win the traveling box that is ready now to send off. (You will need to leave an encouraging comment for Sarah, (you might even like to sign up for the challenge but that won't give you any extra points). Then come back here to let me know you've left a message for her. I'll put your name in a hat, and hubby will pick a winner, say on Saturday the 24th. (You may want to know that the box costs $15.45 to ship in the U.S., and you will be responsible to ship it on to the next recipient.) Sorry, but because of the exorbitant shipping price to foreign lands - only U.S. persons can play. Make sure I can get your e-mail address, so I can let you know you've won, and get your snail mail address. (Boy there are a lot of technicalities.)
This contest is now closed, as of March 24, 2012.

Paper Piecing Tutorial
Okay, back to the  quilt I'm making.  This is an easy paper piecing block I found in one of the magazines in the traveling box. It's 3 pieces that make a square that is on point within a square. 7 pieces in each block.


This is the pattern. (It's a 7", so bigger than I usually work on.) If you already know how to paper piece you might like to quit now.  You probably do it better than I do - I'm not real picky about the size of the seam allowances, which makes my way a lot easier.


First make a few patterns (keeping one as a master). Next cut a piece of fabric that you want to have in the #1 position... The fabric piece must be bigger than the #1 pattern piece by at least 1/4 inch all the way around. Put the fabric piece on the plain side of the pattern with the "pretty" side away from the paper and plenty of seam allowance on all sides of the #1 pattern piece. (Check it by looking through the paper to the fabric... hold it up against the light of window or lamp.) Pin it in place. (Check it again so it didn't move during pinning.) Here is the first piece in position and pinned.

Below it's pinned on the numbered side (where you are going to sew after you add the second piece.)


Add the second piece of fabric, "pretty" side  to pretty side on the plain side of the pattern.
Check to make sure that it goes over the line between #1 and #2 and is enough seam allowance. Holding both ends, turn to the numbered side and place under the needle. (Make sure you have the stitch length on about 15 stitches to the inch. Later you will need to have a secure stitch to allow removal of the paper.)  Back up stitch a couple of stitches, then stitch on the line between 1 and 2, back stitch a couple of stitches at the end of the line, too.
Here is a good time to turn on your machine!


Trim your threads.
Trim the seam allowances so there is enough. This is more important on smaller pieces, and when the newest piece is white. If you don't want shadows showing through white, trim the darker fabric to a smaller seam allowance than the white. - No kidding you will thank yourself for taking this one  more step.
Next - press the seam open.
Next add the 3rd piece.
Check to see that there is enough seam allowance, then sew as before. Trim your threads.
You don't want to cut the paper pattern, so sometimes it is easier to fold back the paper to trim the seam allowances. (See above and below.)


(Above the center 3 pieces are sewn on. Next the triangles.)
Line up the pieces so there is enough seam allowance, and the fabric is pretty to pretty. Sew on the lined side. Trim threads and seam allowances and press.
I use a strip of fabric, so I need to trim off the excess in order to sew the next triangle. See below.
Cut the fabric (above) so it leaves at lease a 1/4 inch seam allowance all around. I just eyeball it. You can trim to 1/4 inch later, but I don't sew paper pieces that way... I'll show that secret tomorrow.
Add the next numbered piece. (Should be #5.) Make sure there is enough seam allowance. Sew, trim, press. Add the next piece.


Below I have sewn the last pieces on and pressed.  Another block done.
The pic below was supposed to show the pattern side after the fabric (above) is all sewn on, but you can't see anything different than the original pattern. Trust me all the central lines have stitches.
Sew - now you start another block. I'll blog some hints and the secret I use to attach one block to another without relying on the old 1/4 inch seam allowance.

Now I know you are probably tired of hearing about this, Heaven knows we are all tired of cancer. My Chrissy (daughter) is undergoing major surgery on her liver tomorrow... (breast cancer metastasized to her liver) Tuesday early morning PST.  I sure would appreciate any prayers or good thoughts you could send her way. 

Ask for a Miracle!

Hugs,
Terri

Friday, March 16, 2012

Out and In and Bingo card

(I'm not getting old or anything, but I had to look at the pictures to see what this blog was all about.  Also, I hope you don't think I'm shouting, but I had to up the size of the type, so I could read it... another old lady thing!)

 I got a traveling box of fabric, books and patterns on Thursday! So I sat right down and checked it out.  I kept the books Luscious Landscapes and Scrap Quilts, a Dogwood Delight pattern, and about 2.25 yards of fabric (2 larger pieces and 3 fat quarters) all shown in the first two pictures below.


I added into the box the books Fabled Flowers, Art Quilts, and Quiltart: Curves Made Easy, 3 and 1/2 yards of fabric, and 4 butterfly squares and a pattern for applique fairies... I'll never do applique, not well enough to bother with the fairies.


That was fun!!!! Now I need to check in with Sarah to see who gets the box next.  I hope it's U.


On another note.... I finally finished my Bingo card.  Ta Dah...... 


The pieces represent:

Under the B: Blue daisies, Blue coated pirate, blue background baseballs, blue eyeballs, blue dragonflies
Under the I: yellow roses, yellow butterfly, yellow chicks, yellow background letters, yellow background stars.
Under the N: red background dog, red bricks, center space (black), red leaves, red cherries.
Under the G: green swirls, green leaves with ladybugs, green golf course, green background hearts, green swashes.
Under the O: purple bubbles, purple paisley, purple circles, purple triangles, purple polka dots.

I think this is the happiest I've ever been with a project I've made. The yellow and orange title piece came together so well... how did they know to make the color change along the lines of my columns?  I used letters printed out of the computer at 120 point and the enlarged by 142% to make the BINGO letters at the top... I traced them using my very excellent light table and filled them in later. I quilted in the ditch with black thread, and then pieced the binding in scrap orange pieces.  The ends went together without a hitch - I used to struggle with that, but now I've got it down to a science - no measuring, no swearing or crying. I wish my quilts were so fun and easy! (To Sheila, I know I said I wouldn't put the word BINGO on the top, but I changed my mind... woman's prerogative.)
If you'd like to participate in the BINGO thing use the second button on the right side bar. I'm kind of going at this blindfolded... we will see what it's all about.

Next on the "To Do List" is starting the quilt for Hands 2 Help Charity Quilt Challenge .... check it out to see if you would like to participate. Let me know if the button (there on my sidebar) works.
I have a pattern in mind, now to pull fabrics. (Shay, that's one of my favorite things!)

Hugs to you all,
Terri